Install brother printer driver software on a Windows PC
Get Started NowHow do I install brother printer driver software on a Windows PC?
Setting up a Brother printer on a Windows PC requires installing the correct driver software to ensure smooth operation. Follow this step-by-step guide to download, install, and configure your Brother printer driver properly.
Step 1: Check Compatibility
Before installing the driver, verify that your Windows version is compatible with your Brother printer model. You can check this information on the Brother support website.
Step 2: Download the Latest Brother Printer Driver
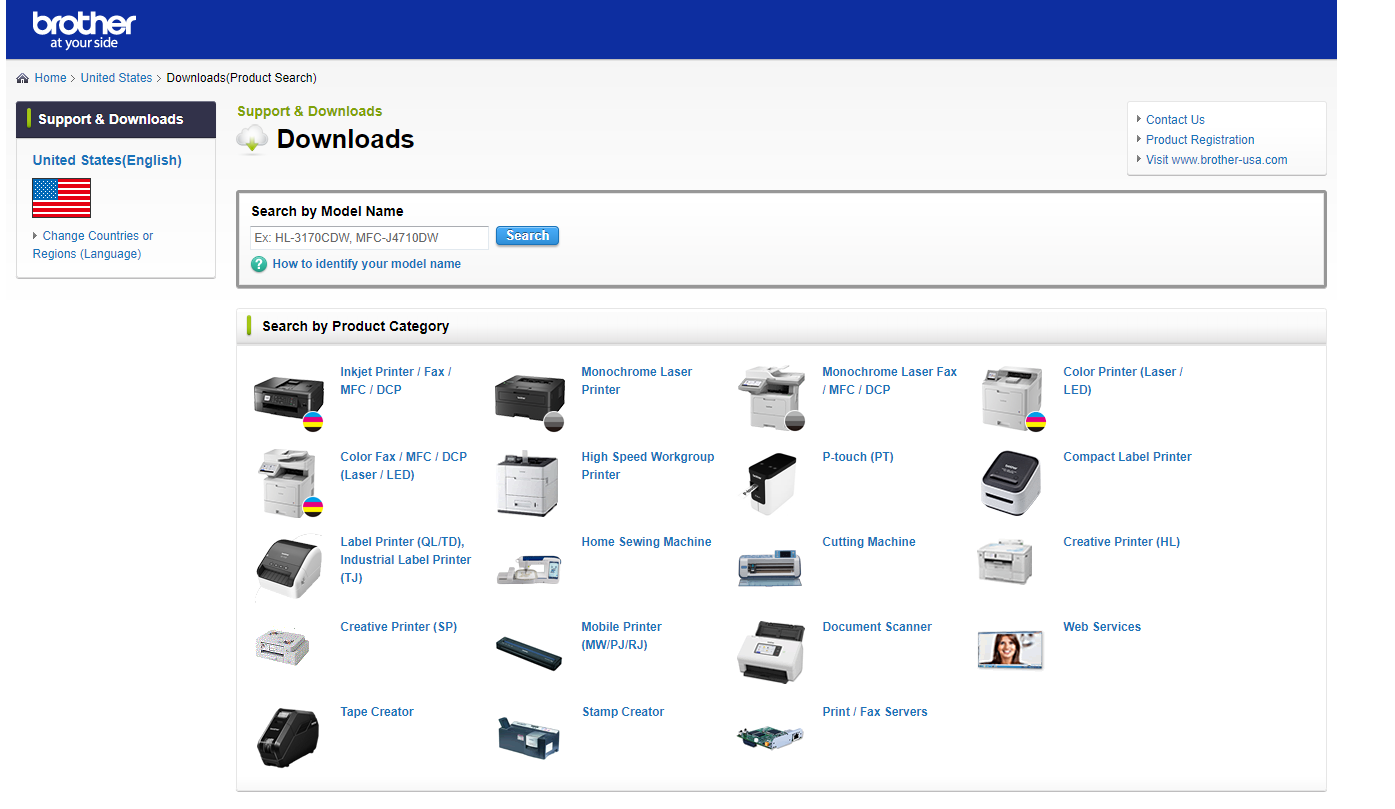
- Open your browser and go to the Brother official support page (support.brother.com).
- Tap on the Download button and then enter your printer model in the search box and press Enter.
You can also select product category then enter series number or you can go with the above step by enter printer model directly.
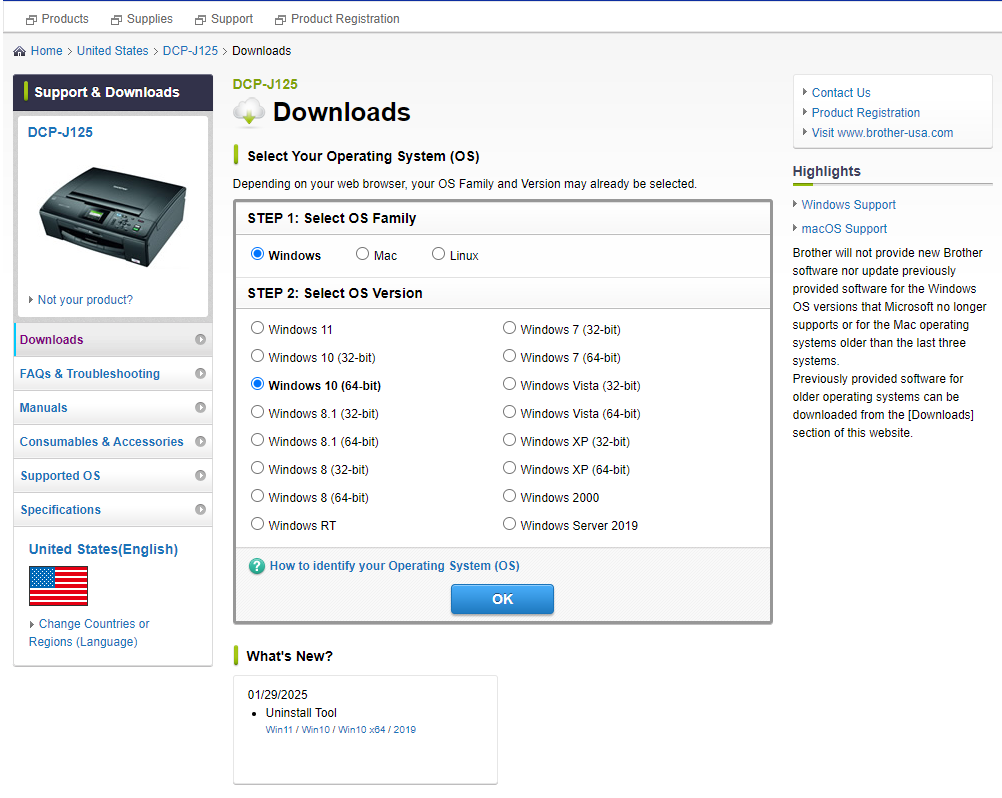
- Select the correct Windows version (Windows 11, 10, 8, or 7).
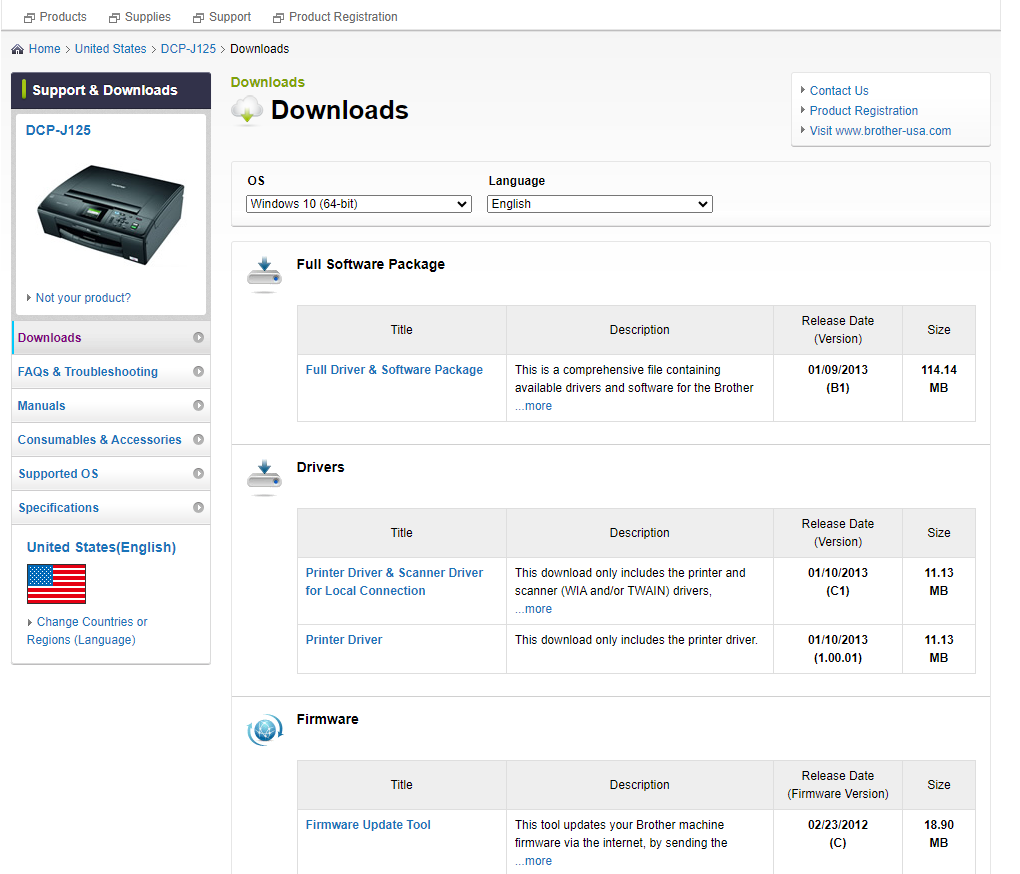
- Download the Full Driver & Software Package for your printer.
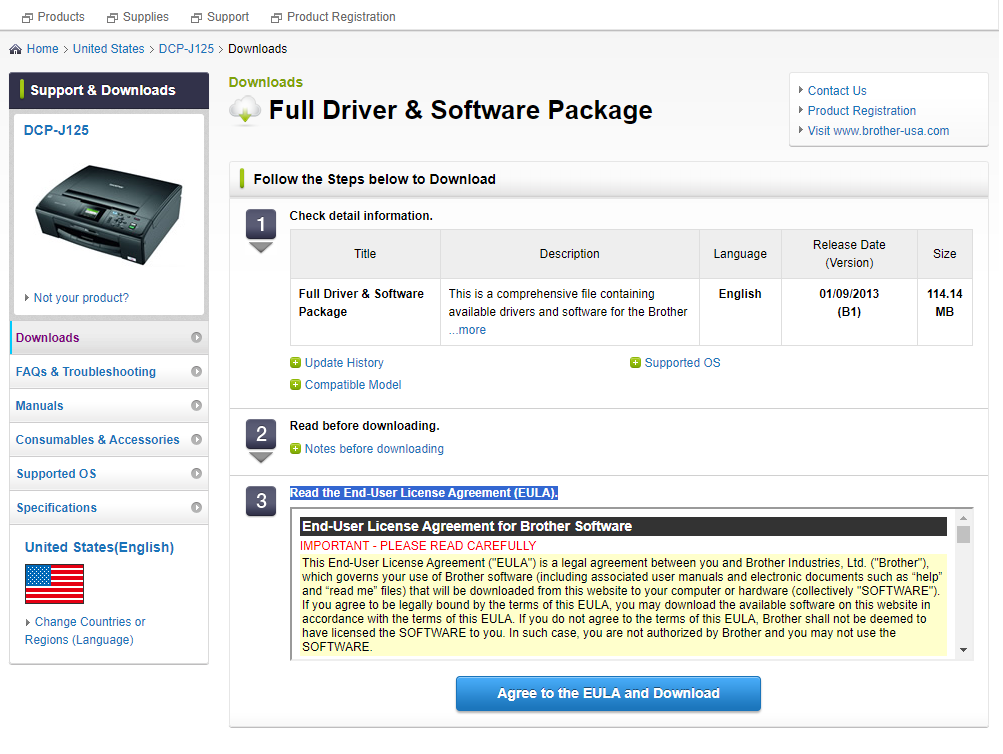
- Read the End-User License Agreement (EULA) and agree by tap on Agree button.
Step 3: Install the Brother Printer Driver
- Locate the downloaded file (usually in the Downloads folder).
- Double-click the installation file to start the setup process.
- Follow the on-screen instructions and accept the license agreement.
- Choose a connection type:
USB Cable: Connect your printer when prompted.
Wireless (Wi-Fi): Select your Wi-Fi network and enter the password.
Ethernet: Ensure the printer is connected to the same network as your PC. - Complete the installation and restart your computer if required.
Step 4: Set Brother Printer as Default
- Open Control Panel and go to Devices and Printers.
- Find your Brother printer, right-click it, and select Set as default printer.
- Open any document and press Ctrl + P to print.
- Select your Brother printer and click Print.
Your Brother printer driver is now successfully installed! If you face any issues, check the Brother website for troubleshooting tips or reinstall the driver.